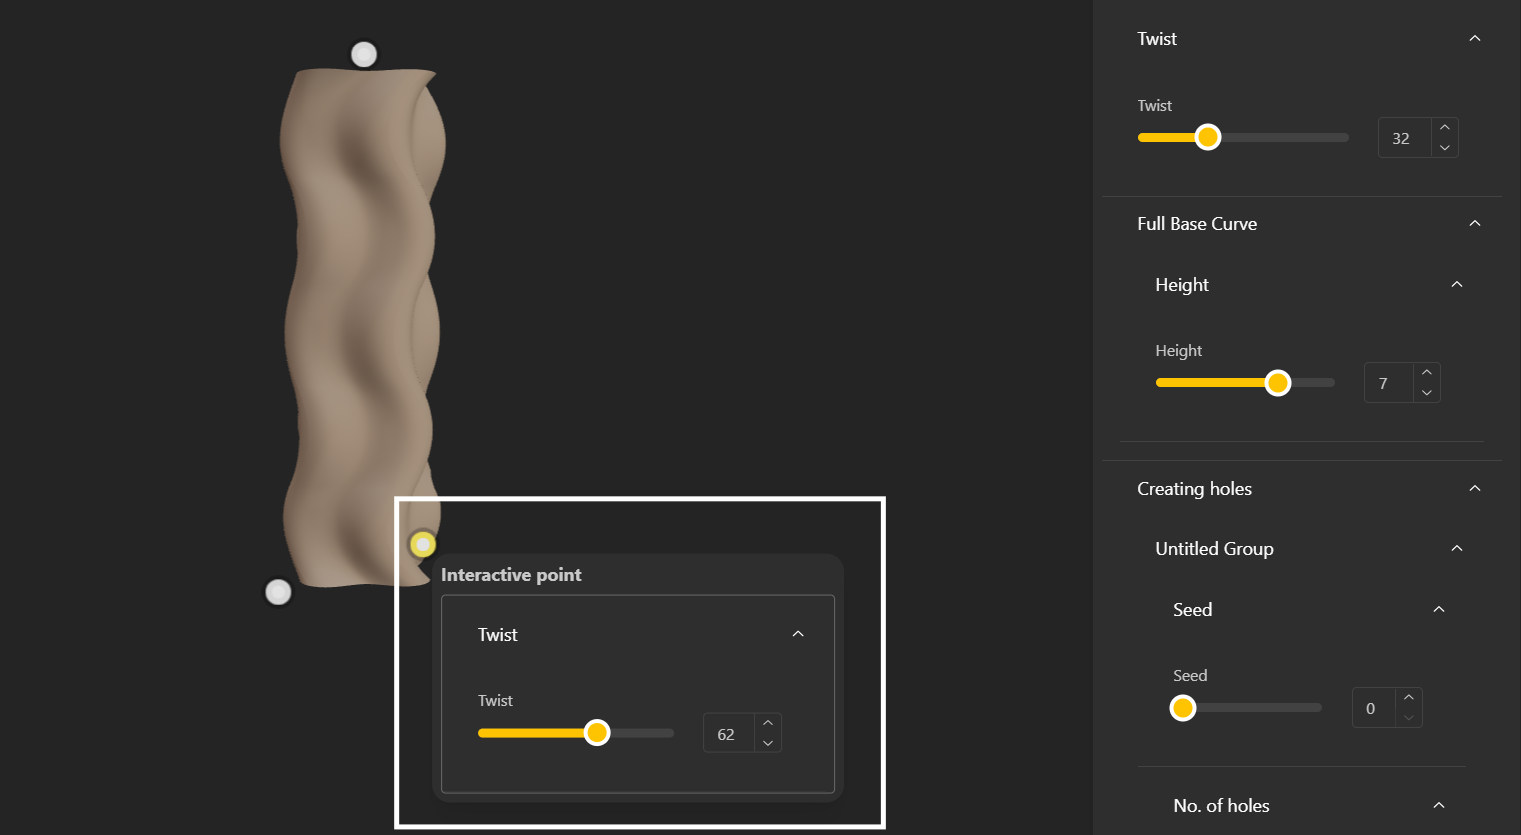
An Interactive Point is a visual control anchor placed directly within your 3D model’s viewport that lets designers and viewers interact with specific aspects of a model by clicking.
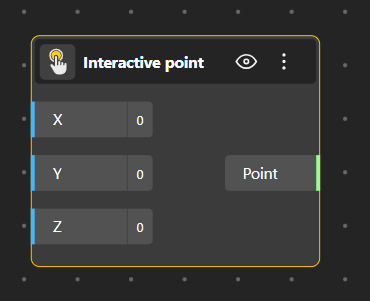
It acts like a clickable hotspot tied to a location in 3D space.
When clicked, it reveals or triggers certain design parameters right at that spot.
It helps users interact with the model more intuitively and visually.

Create an Interactive Point Node
Open BeeGraphy Editor
Add an Interactive Point node.
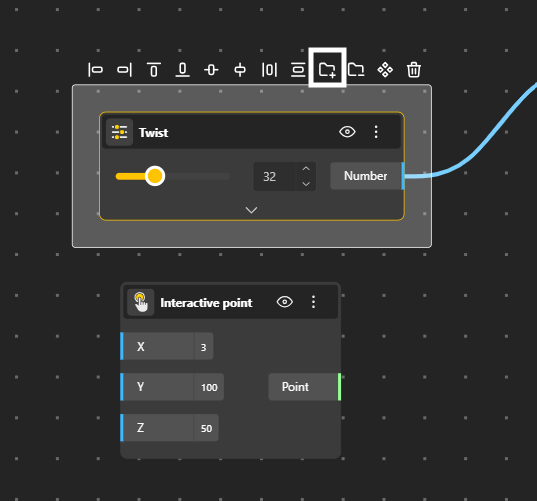
Input values for a specific 3D coordinate (X, Y, Z) determining the position of the Interactive Point.
Select the Parameter(s) you want to link with the Interactive point and create a group of it.
Click the (⋮) to open the dropdown, then select Link Interactive Point.
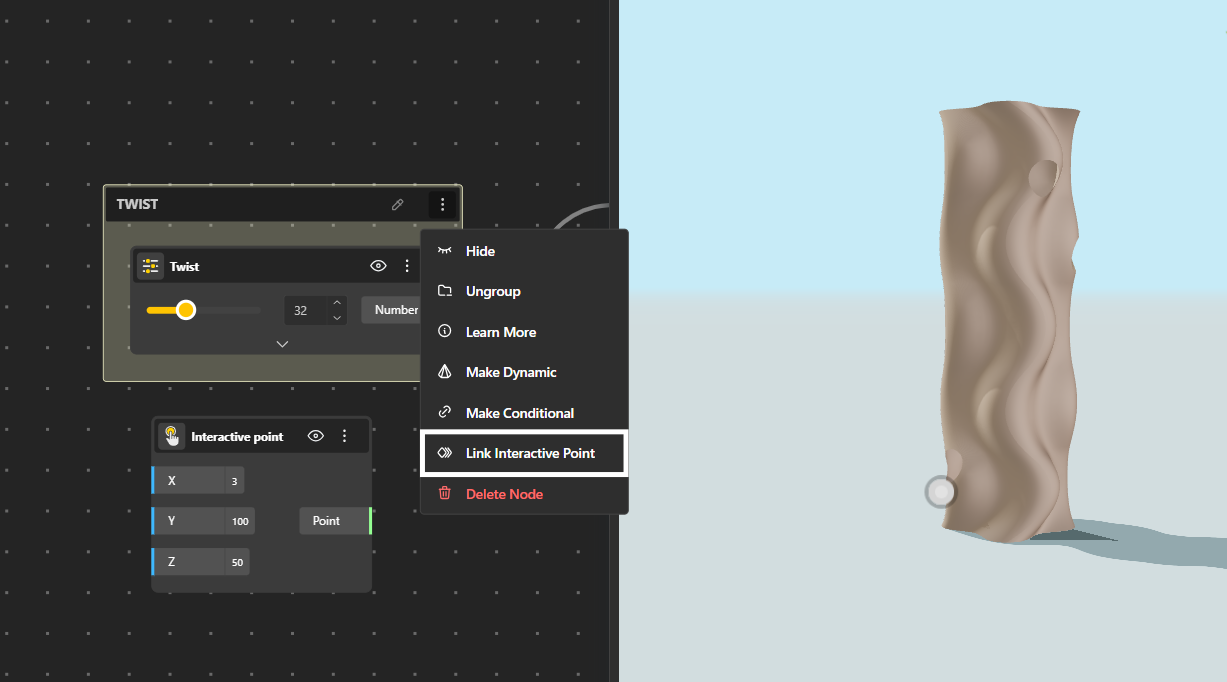
Select the Interactive Point you want to link to the parameter(s).
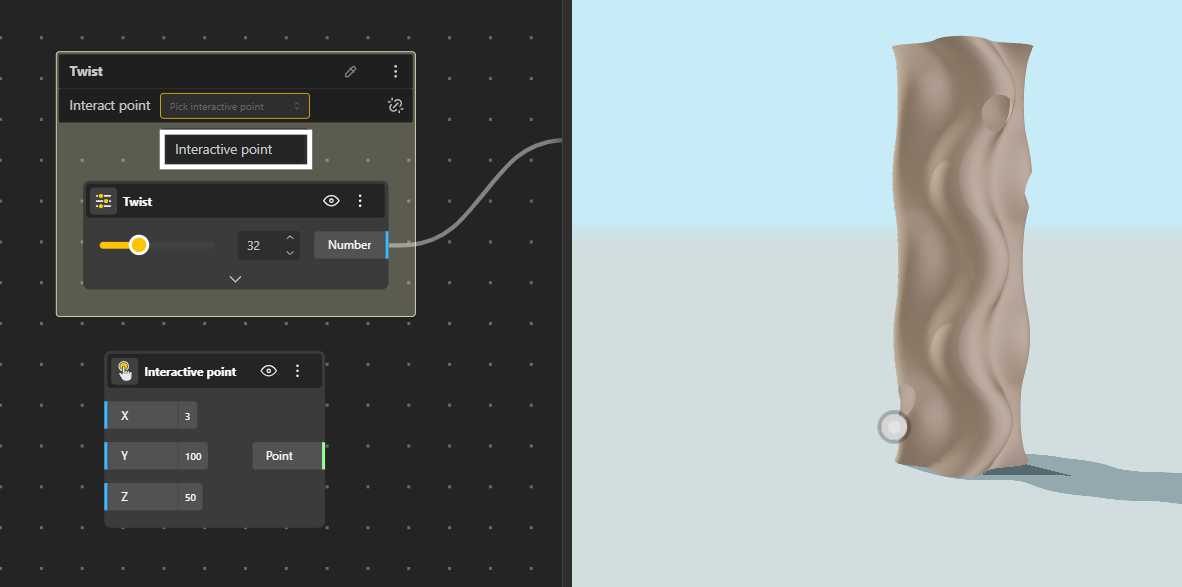
Now, Users can click on the Interactive Point in the Configurator/Demo to view/adjust the the relevant controls. This makes exploring and modifying designs easier. And ensures that interactions stay contextual and accurate, even in complex models.
Faster interaction: No need to scroll through menus to find what you want.
Clear visual cues: Users see exactly where they can interact.
Reduced clutter: Controls only show up when relevant.
Great for configurators & presentations: Perfect for client demos or product customization interfaces.