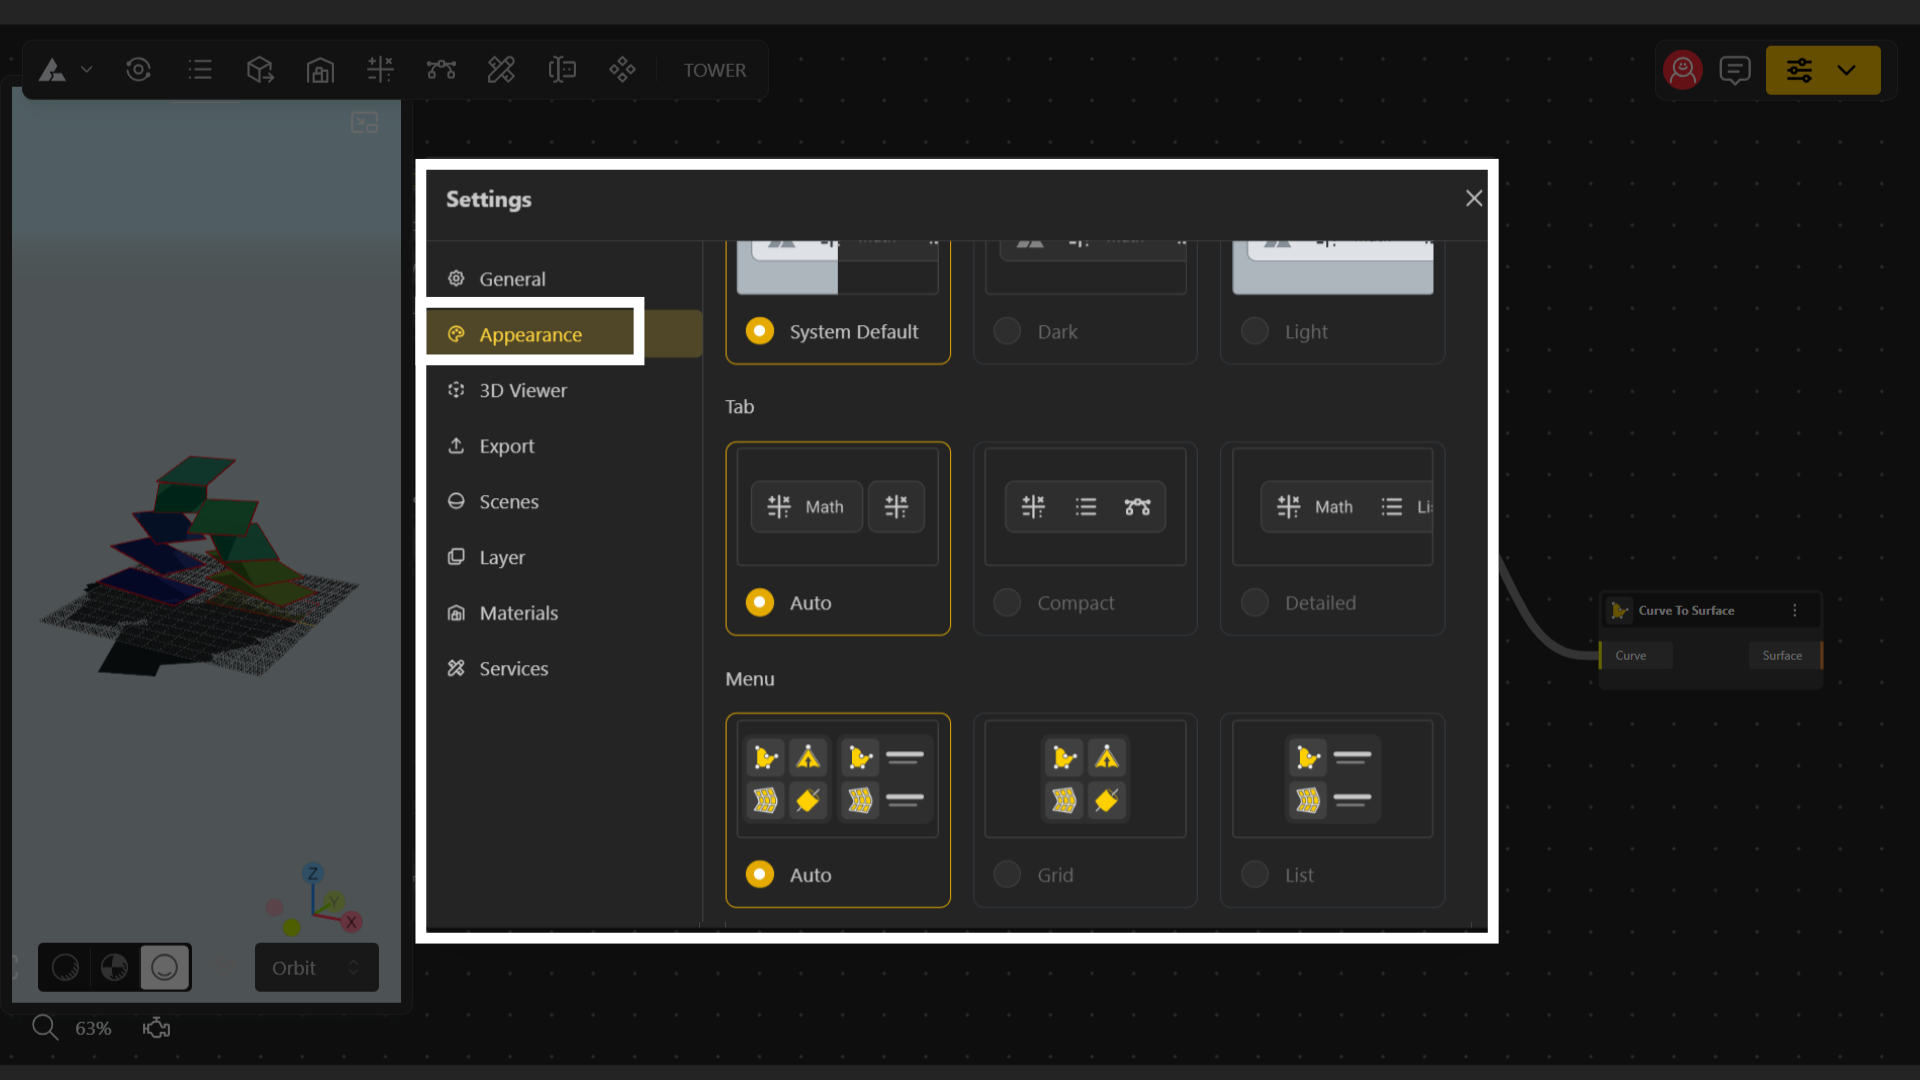
This quick guide helps you optimize your workspace for clarity, comfort, and faster design workflows.
To change the appearance of your workspace/editor in Beegraphy:
Open your workspace and load your model.
Click on the Beegraphy logo at the top-left corner to open the dropdown menu.
Select Settings.
When the Settings dialog opens, navigate to the Appearance tab.
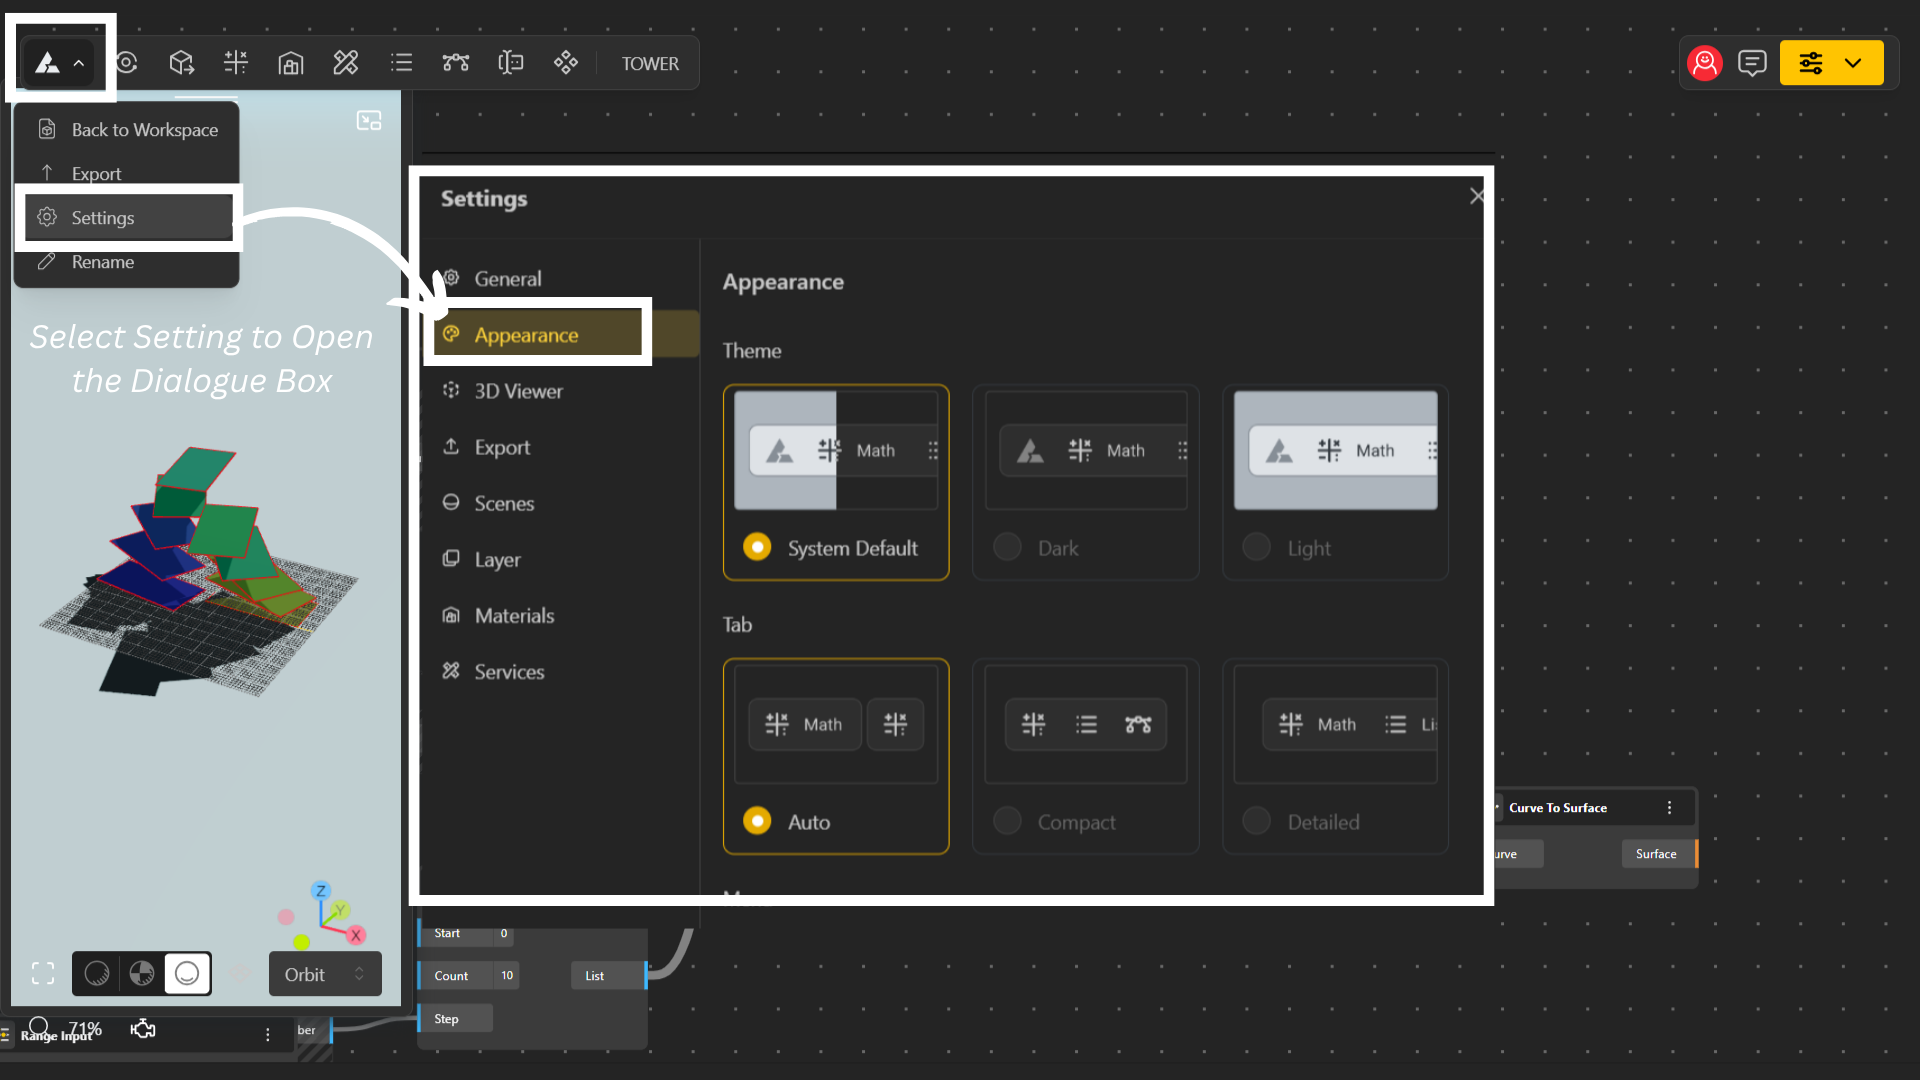
Appearance Options
Theme
System Default – Matches your computer's system theme.
Light – Switches your workspace to a light theme.
Dark – Switches your workspace to a dark theme.
Toolbar Appearance: You can switch between three styles:
Auto – Automatically adjusts based on screen size.
Compact – Minimal view to save space.
Detailed – Expanded view showing labels and icons clearly.
Menu Appearance: Choose how the menu items are displayed:
Auto – Default adaptive layout.
Grid – Displays items in a clean grid layout.
List (Detailed) – Shows items in a structured list with more detail.