This guide walks you through the complete process of creating, versioning, and publishing a plugin in BeeGraphy. Follow the steps carefully to ensure your plugin is properly structured, versioned, and published without issues.
To create a new plugin file from scratch, visit: https://beegraphy.com/bgpm/create-plugins
This page provides the base structure and setup required to build a BeeGraphy compatible plugin package. Follow the instructions there to generate your plugin template before uploading it to your workspace.
Log in to your workspace.
Navigate to Plugins to get started.
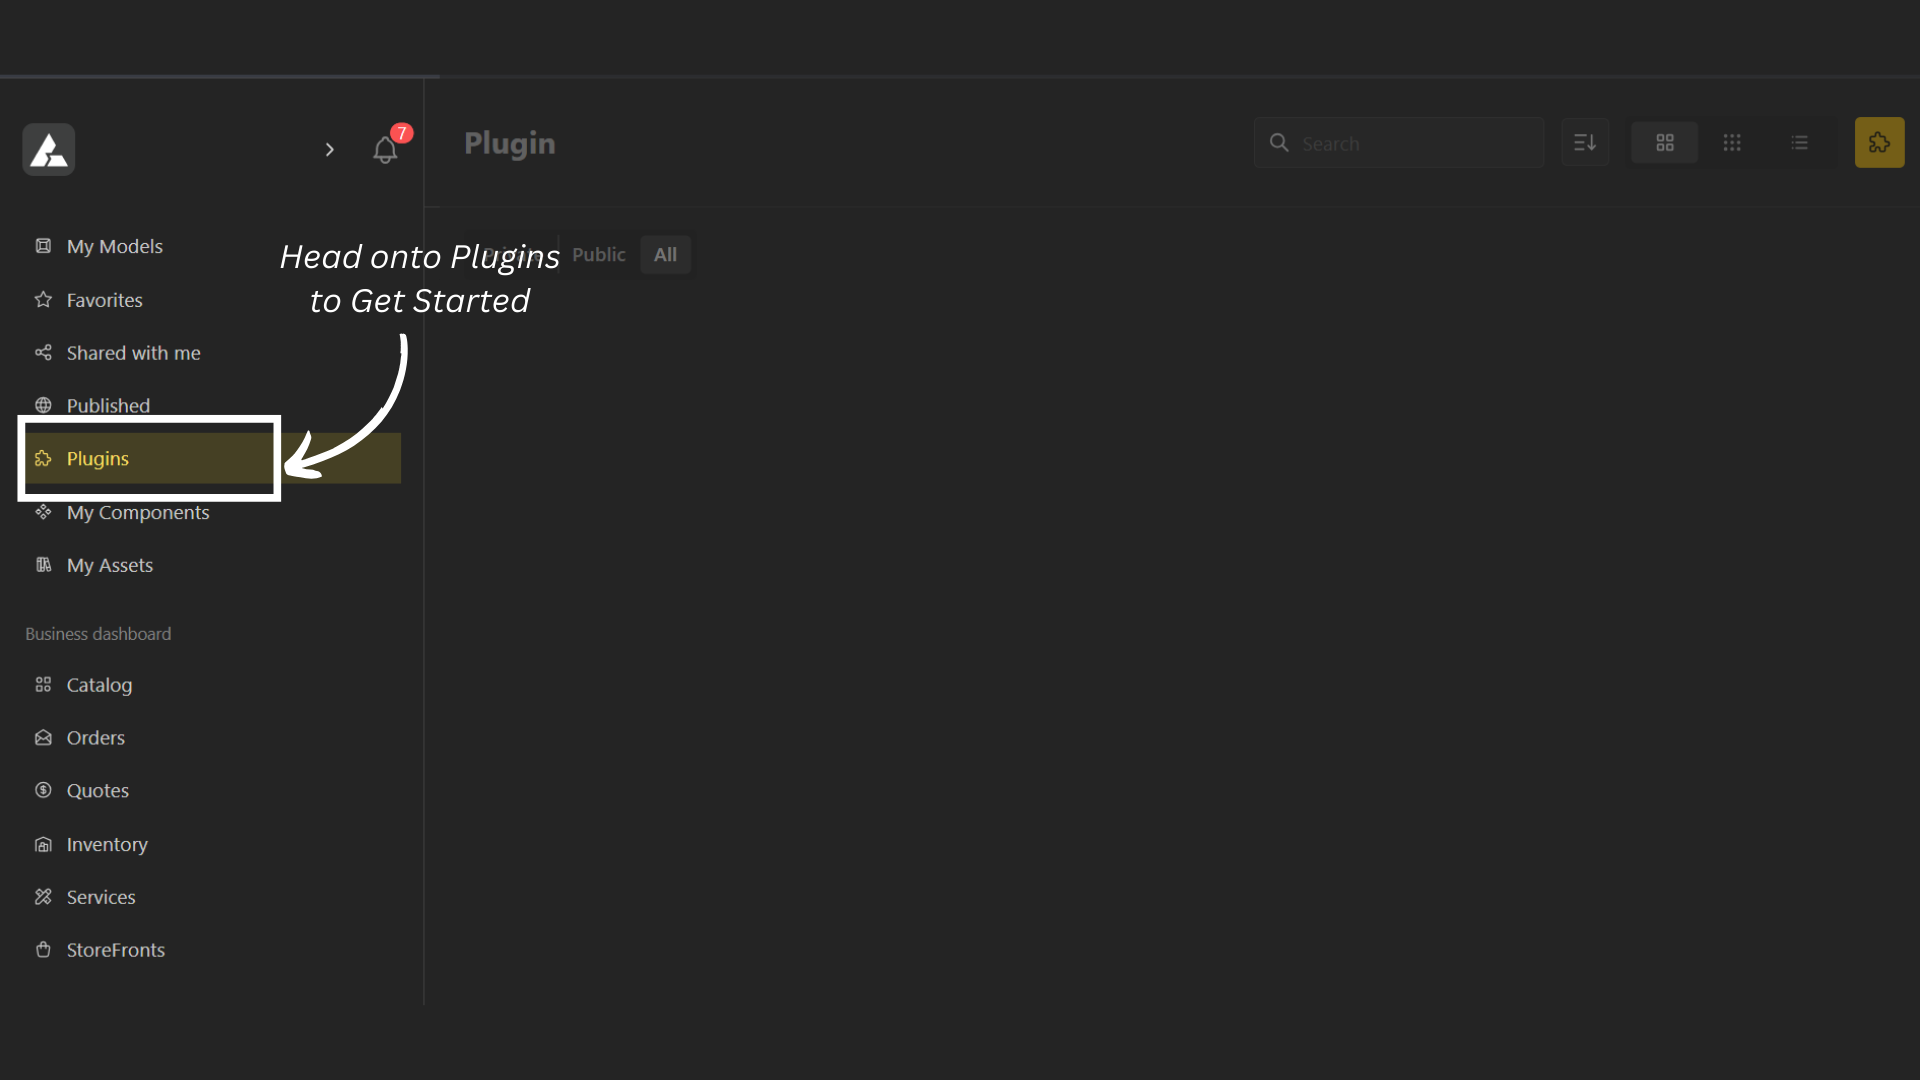
Click the Plugin icon in the top-right corner.
This will redirect you to the page where you can add details about your plugin.
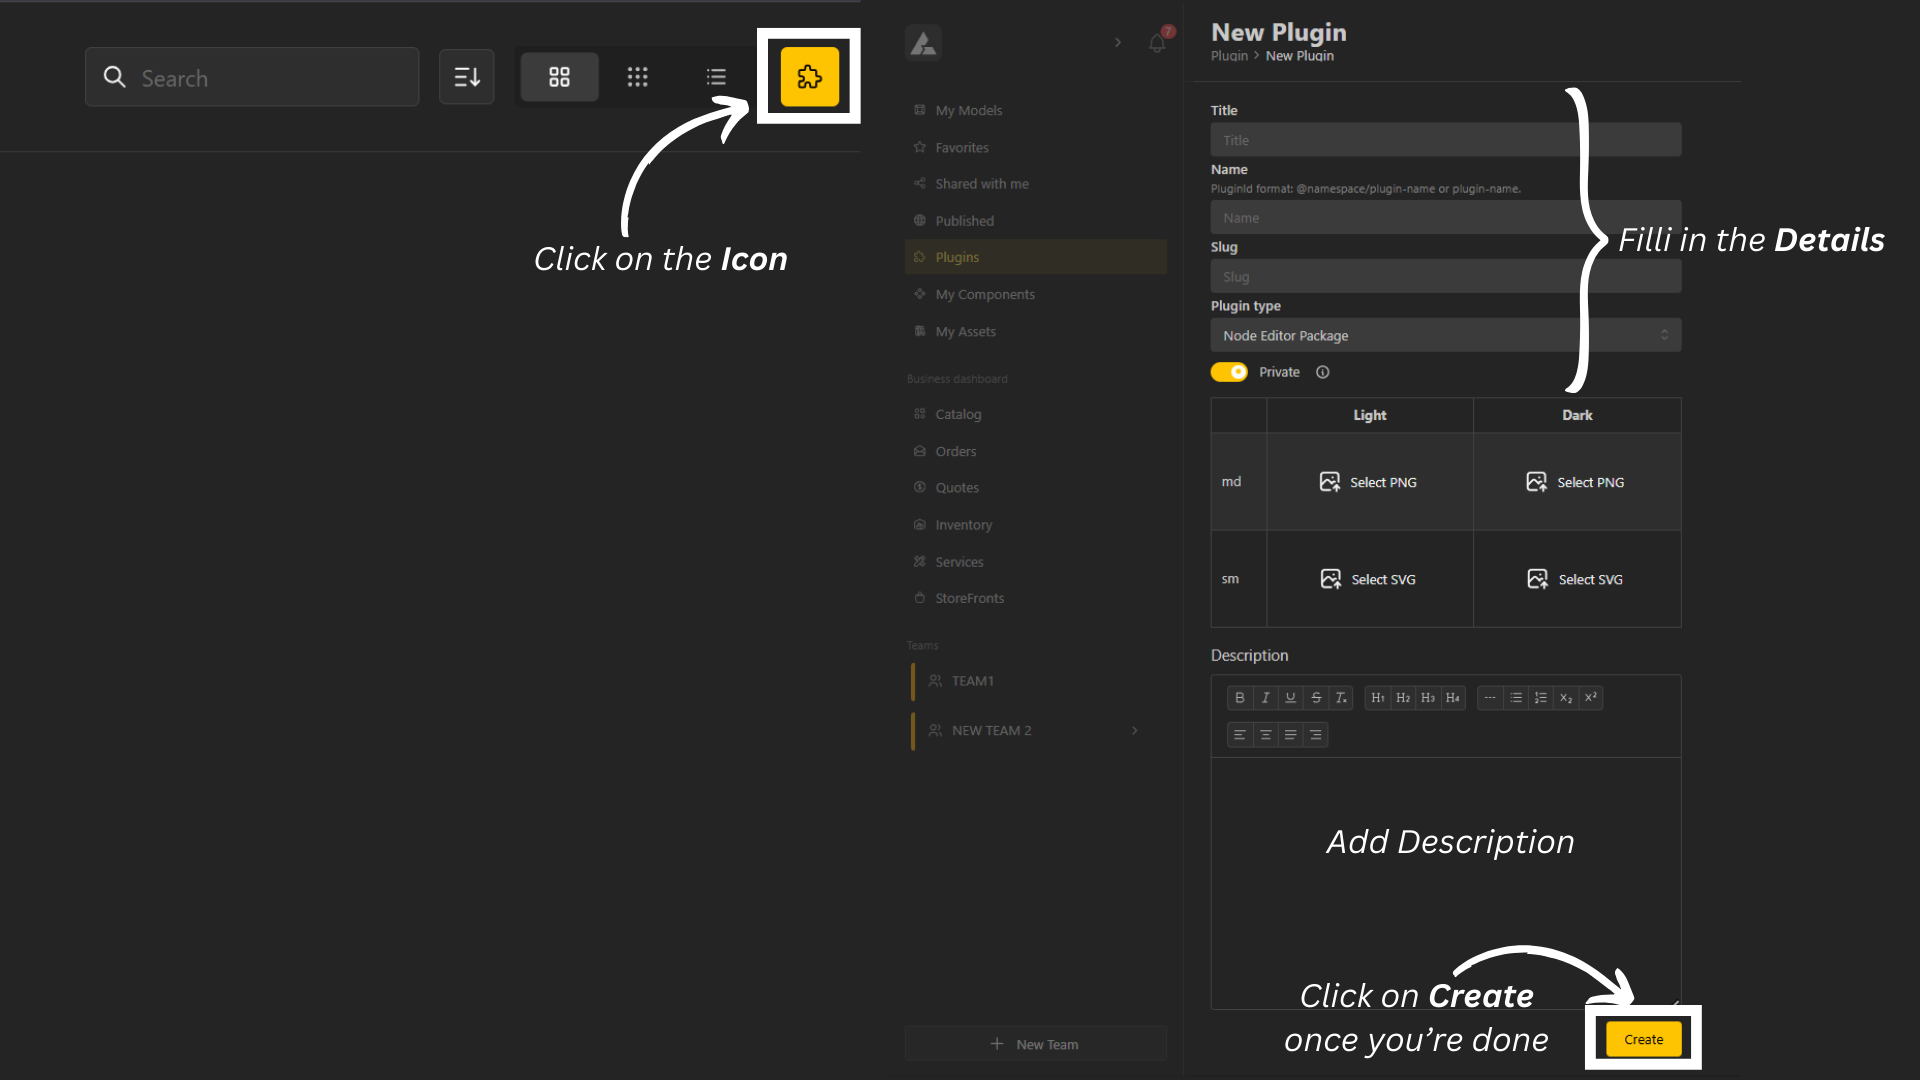
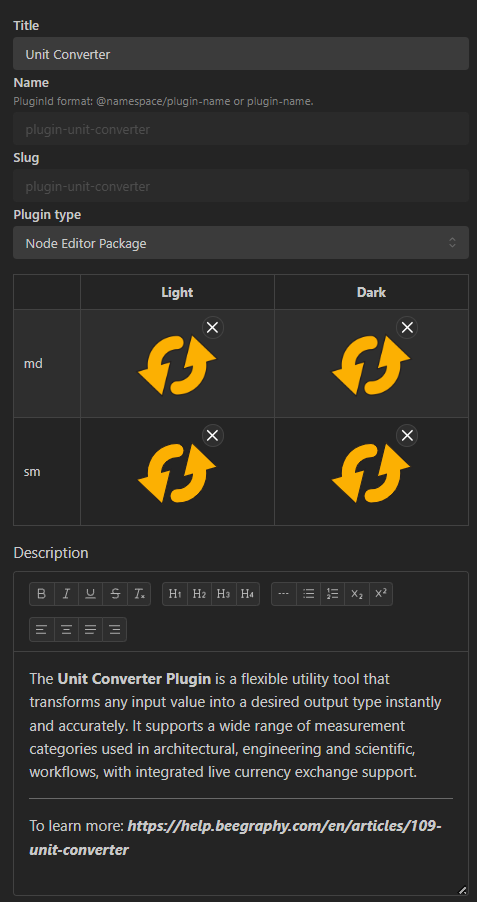
Fill in the required information and keep in the following in mind.
Plugin Name: The name must match the name of the ZIP file you are uploading.
Once a plugin is made public, it cannot be changed back to private.
Ensure your ZIP file is correctly structured before uploading.
After creating the plugin:
To upload, click on the plugin.
To edit plugin details, tap the three dots (⋮) and select Edit.
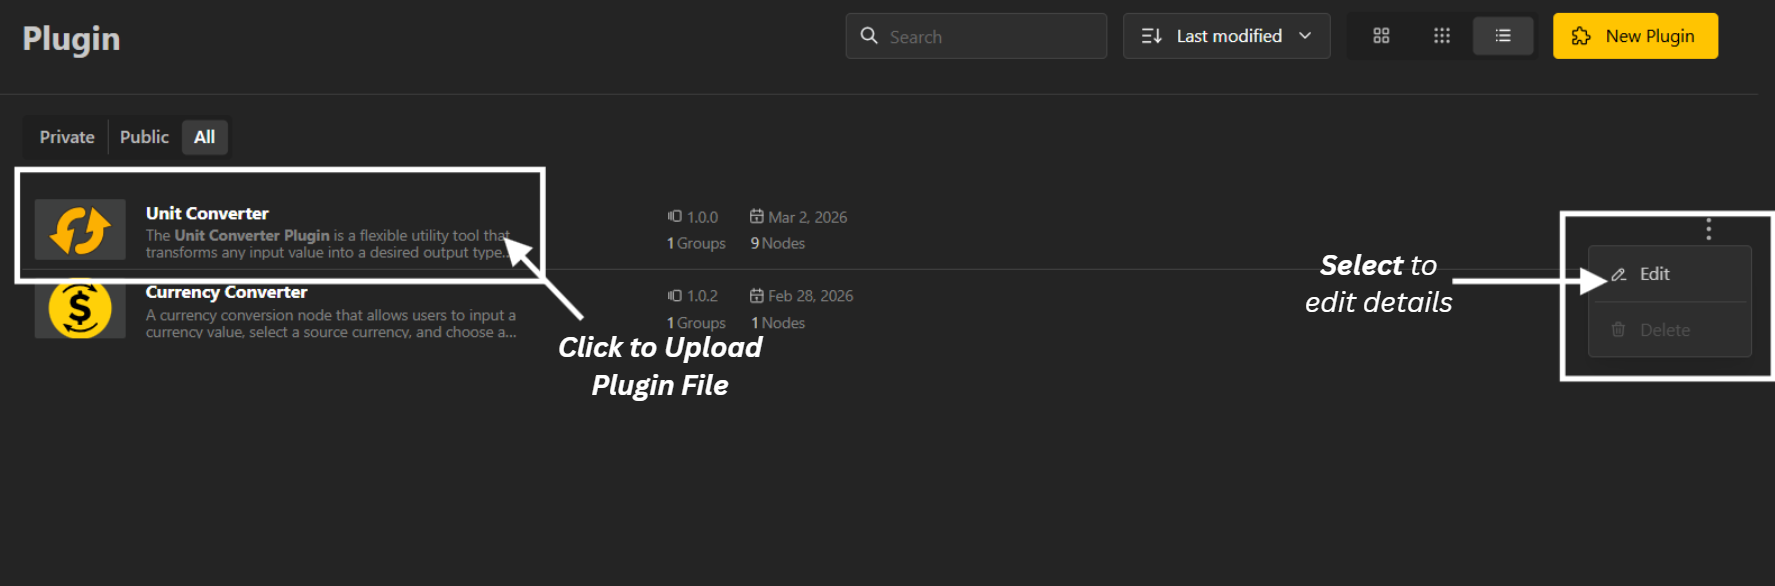
Click on your created plugin.
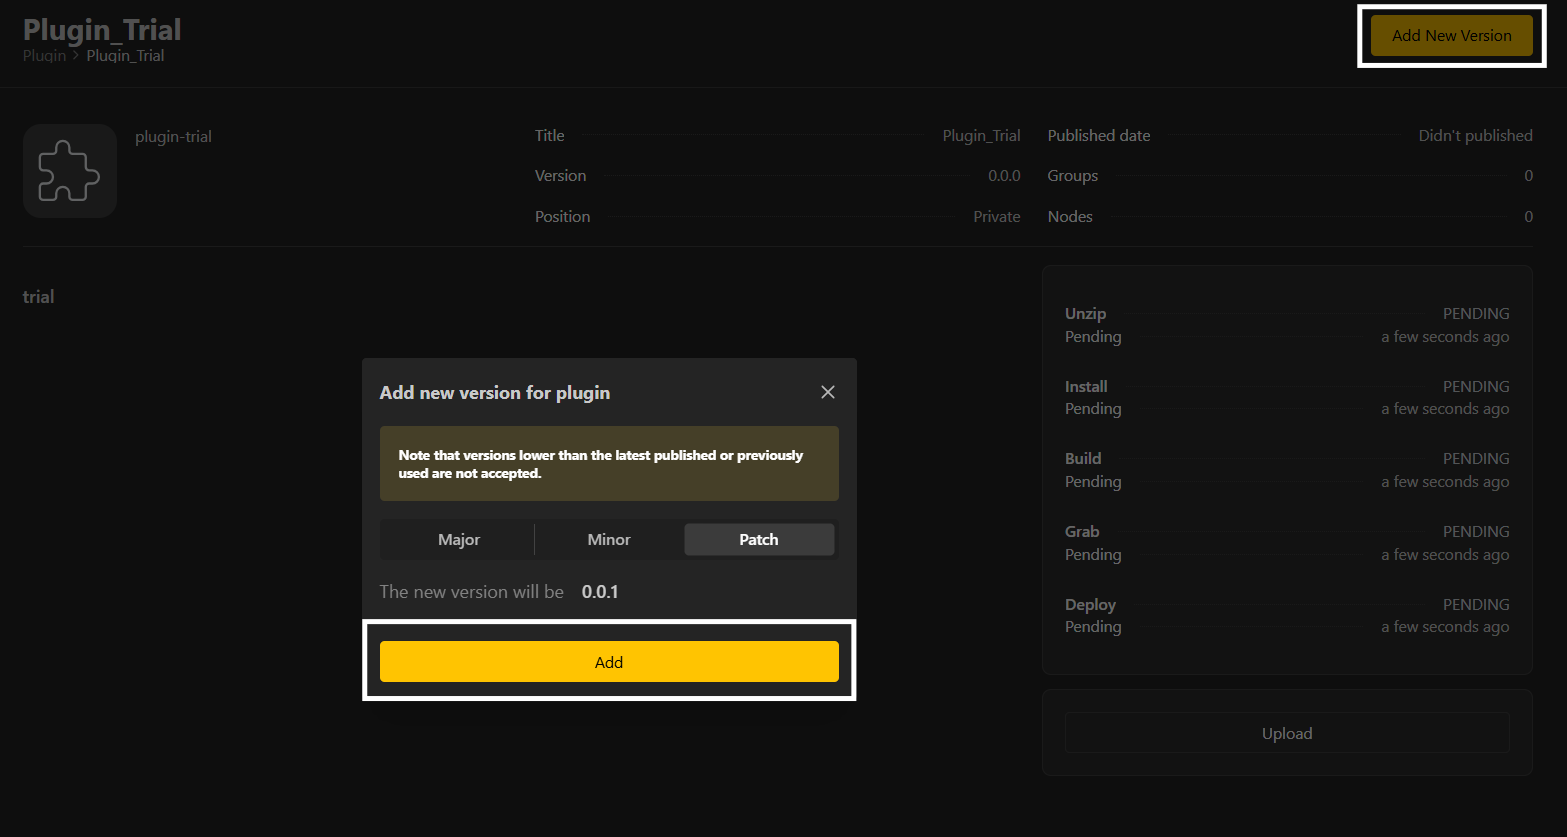
Click Add New Version.
Select your version type:
Patch → 0.0.1 (small fixes or minor updates)
Minor → 0.1.0 (new features, backward compatible)
Major → 1.0.0 (breaking changes or major release)
Upload your ZIP file by clicking on the Upload button.
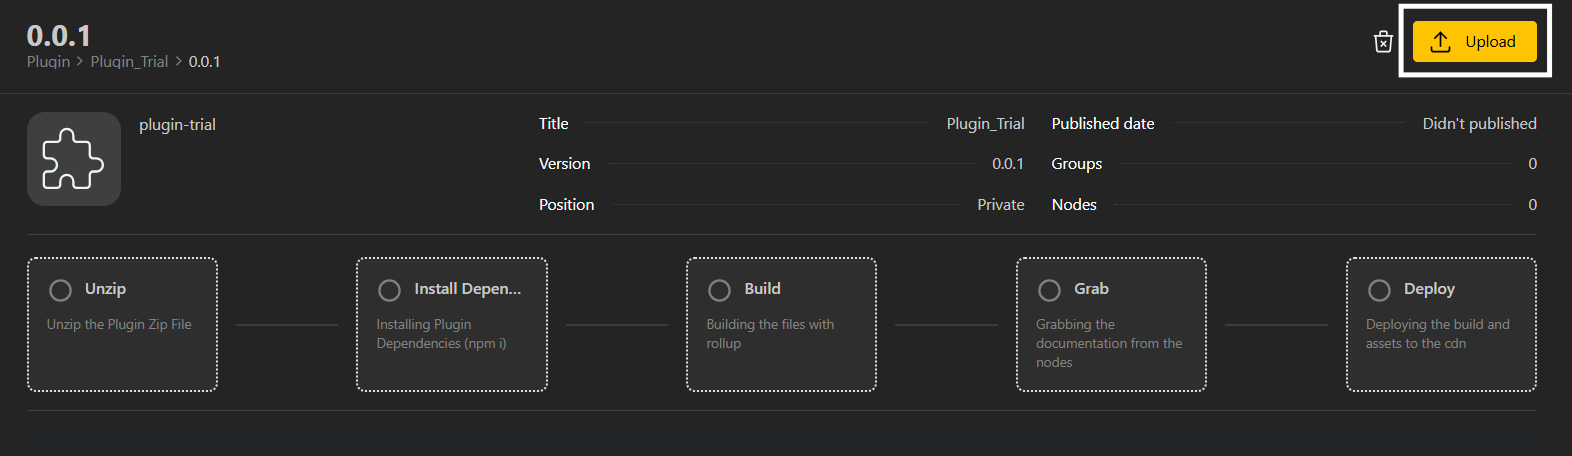
Once everything is uploaded, it should display your version details.
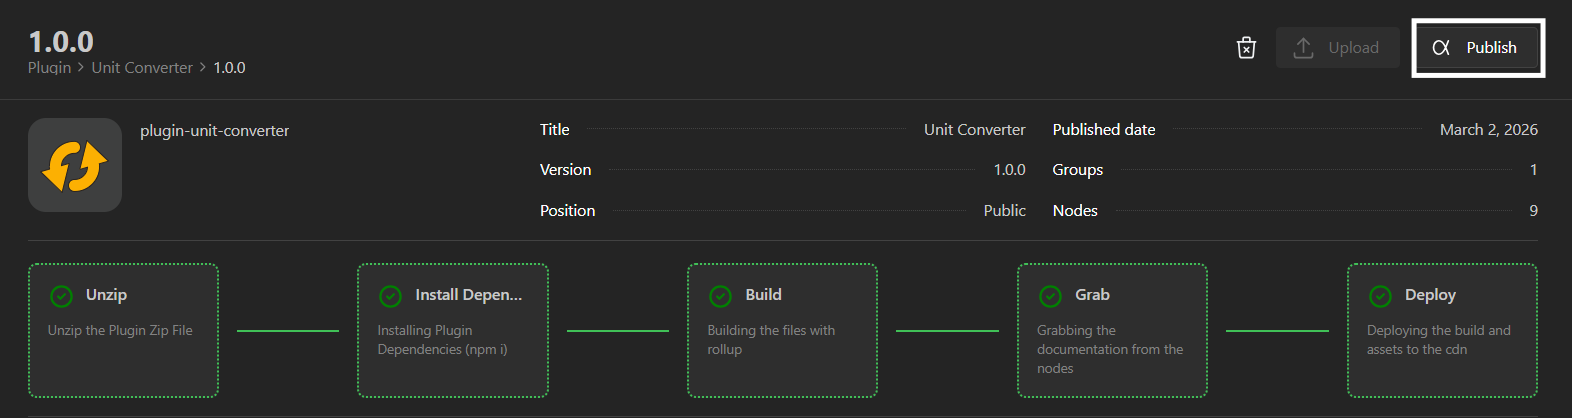
Click Publish to publish your plugin.
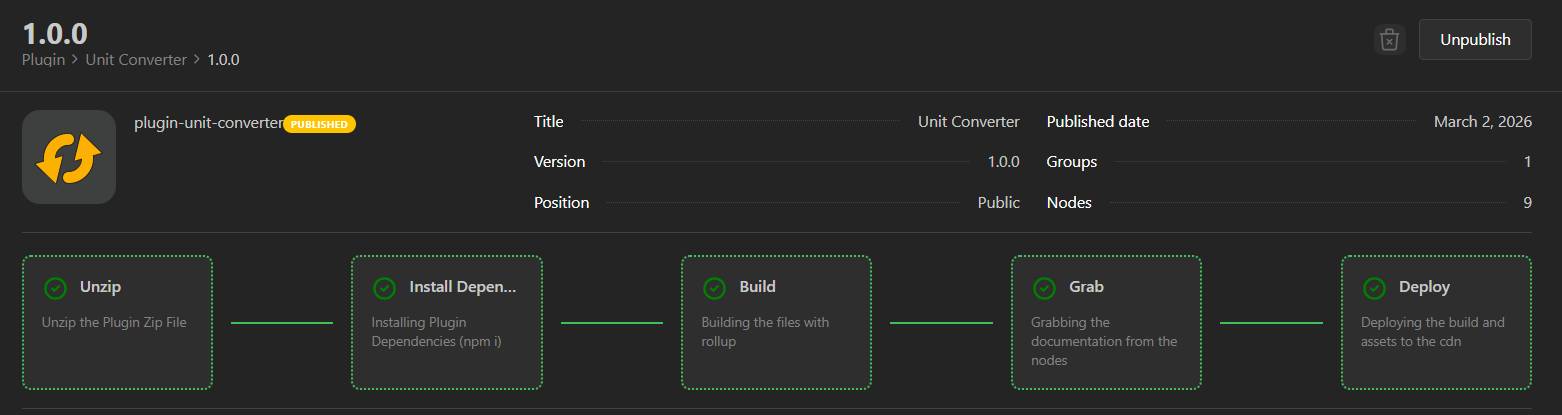
You can unpublish a version within 24 hours from this same page.
After a version is published or a published version is unpublished, it cannot be deleted.
Make sure everything is correct before publishing.
You can unpublish a version within 24 hours from the same page where it was published.
To unpublish:
Go to your plugin
Select upload.
Click Unpublish

Once unpublished, the plugin will automatically revert to its previous published version (if available).