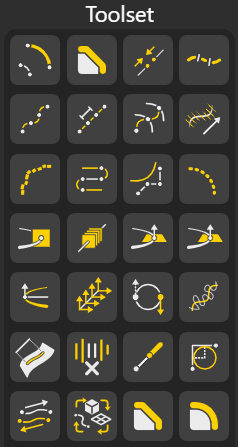
The Toolsets menu brings together all the fundamental nodes you’ll use across your parametric workflows, from geometry creation to transformation and analysis, making it easy to build complex models step-by-step.
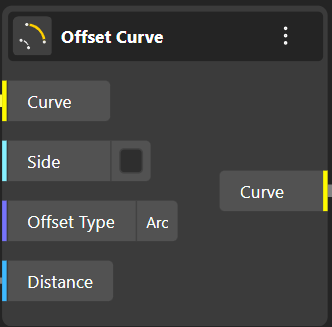
Offset Curve creates a duplicate curve at a chosen distance, running parallel to the original. The node has 4 Input choices.
Curve: Curve to offset
Side (Boolean): Offset curve one side or two
Offset Type: Offset type can be only "Arc", "Tangent" or "Intersection". It is default "Arc".
Distance: Offset distance

Chamfer Curve Cuts the corner between curve segments and replaces it with a straight, angled edge.
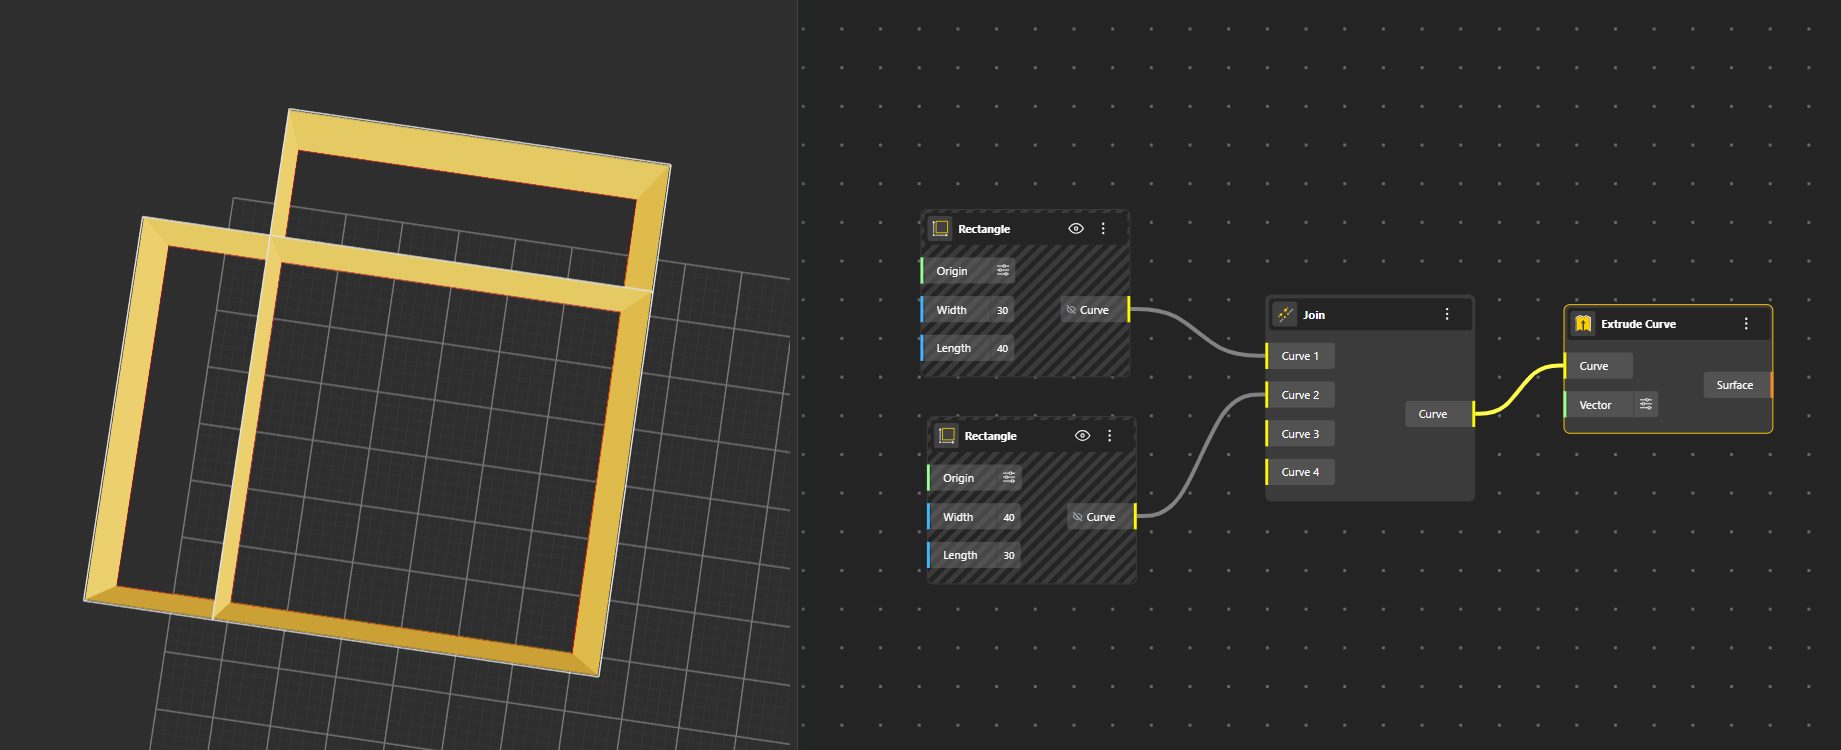
Join Combines multiple curve pieces into one continuous curve. The output curve behaves like one single curve.
It breaks a curve into its individual curve segments. This allows you to work with each piece separately for editing, measuring, or further transformations.
Outputs:
Curves: The curve is split into its independent curve segments.
Points: Returns the key points where segments connect, such as joints, ends, or transition points within the original curve.
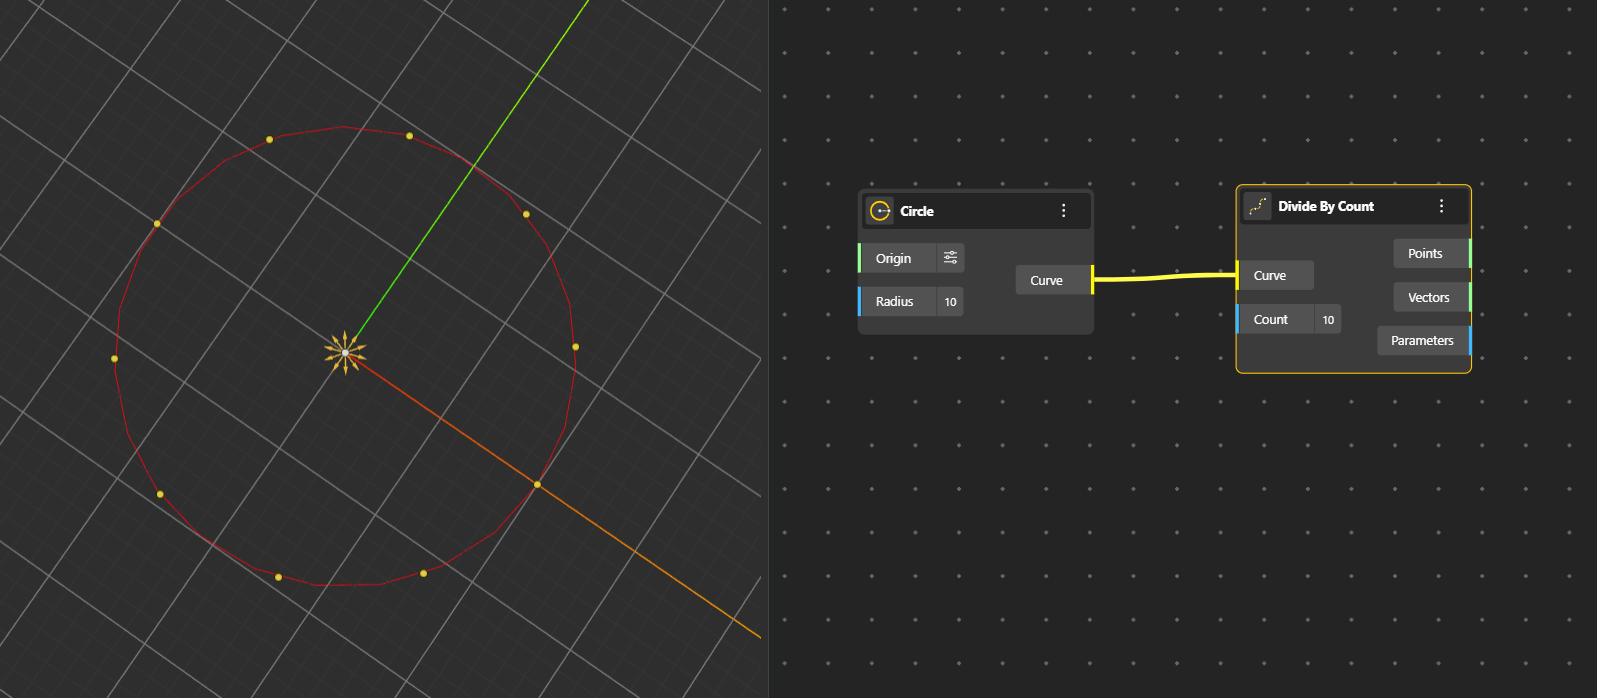
It places evenly spaced points along a curve based on the number of divisions you specify. The output ports give you:
Points: The exact division points created along the curve.
Vectors: Tangent vectors at each division point.
Parameters: Parameter values at division points.
Divide by Length splits a curve into equal-length segments. The output ports give you:
Points: The exact division points created along the curve.
Vectors: Tangent vectors at each division point.
Parameters: Parameter values at division points.
This node places points along the curve at a fixed spacing you specify. The output ports give you:
Points: The exact division points created along the curve.
Vectors: Tangent vectors at each division point.
Parameters: Parameter values at division points.
Contour: Creates evenly spaced section slices along or across a curve.
Shatter node cuts a curve into multiple pieces at specific positions or parameters.
Connect with Curve: Generates a smooth connecting curve between two shapes or points.
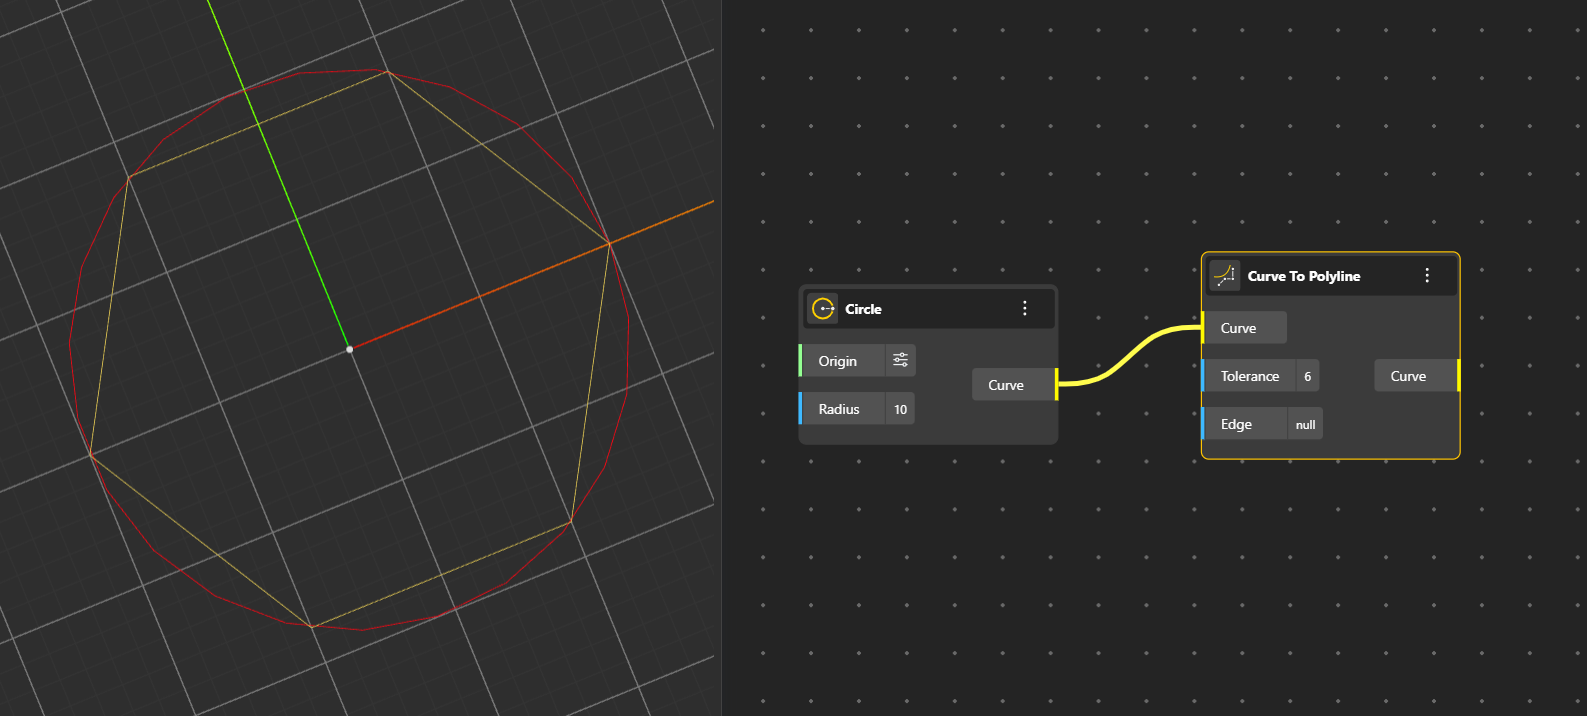
Curve to Polyline: Converts a smooth curve into a series of straight line segments. The output is the polygon as a result of those connected line segments. The input nodes comprise of:
Curve: Input Curve
Tolerance: Number of line segments to be formed i.e. Deviation tolerance
Edge: Optional segment length
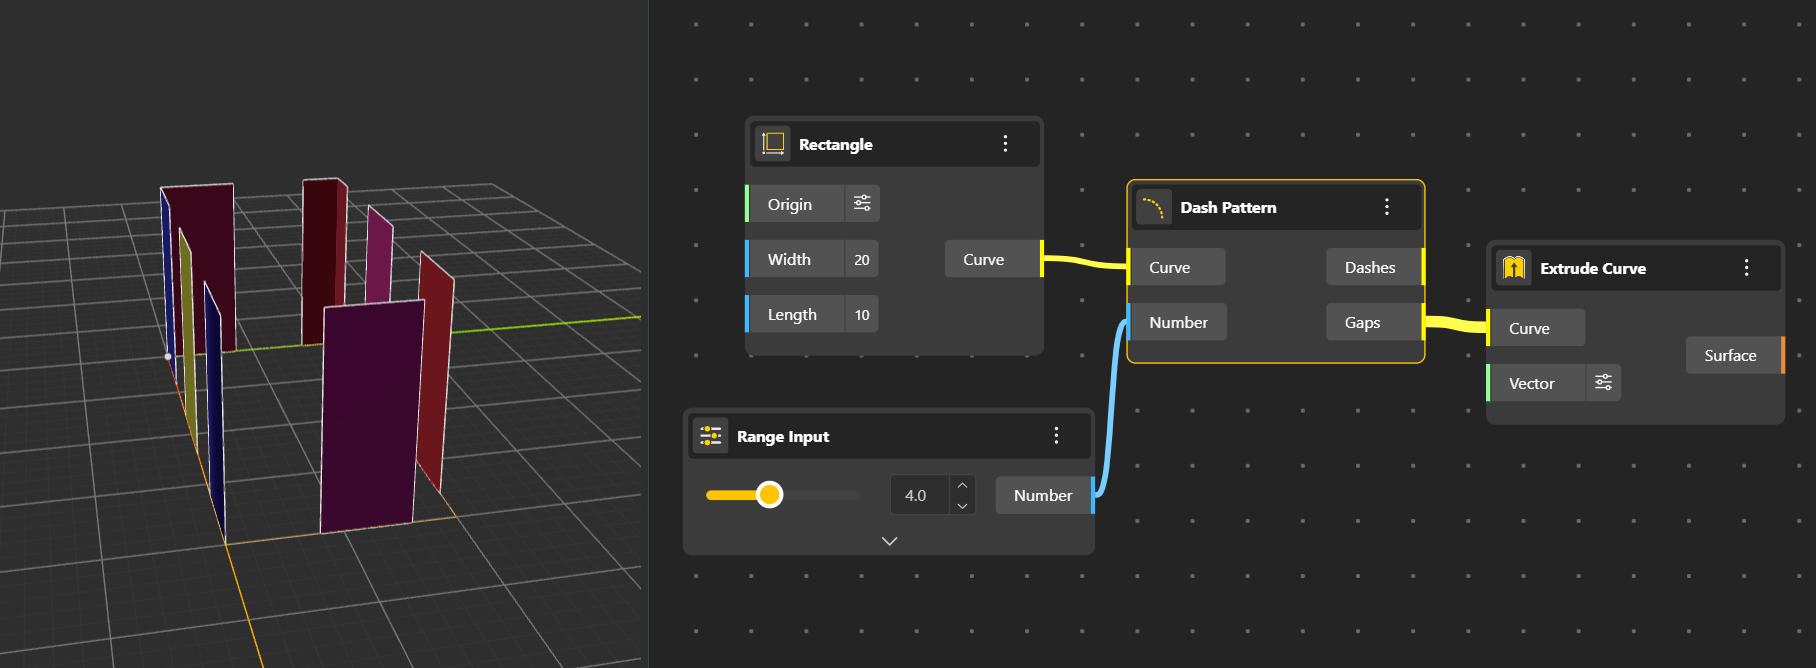
Dash Pattern applies a dashed appearance to the curve based on a pattern you set.
Input Port
Curve: Curve to dash
Number: Define the dash and gap lengths
Output Port
Dashes: Returns Dash segments
Gaps: Gives Gap segments
Perp Plane creates a single plane perpendicular to the curve at a chosen point. You can choose the Parameter (t) from input port at which you want to evaluate the plane.
Perp Planes: Creates multiple perpendicular planes along the curve’s length. You can choose the number of Planes through Count input port.
Horizontal Plane: Creates a flat, horizontal (XY) plane at a point on the curve. You can choose the Parameter (t) from input port at which you want to evaluate the plane.
Horizontal Planes: Creates several horizontal planes distributed along the curve. You can choose the number of Planes through Count input port.
Curve Plane: Generates a plane that aligns to the curve’s direction at a specific location. You can choose the Parameter (t) from input port at which you want to evaluate the plane.
Curve Planes: Produces multiple curve-aligned planes along the curve. You can choose the number of Planes through Count input port.
Seam Changes the starting point of a closed curve to adjust mapping or orientation.
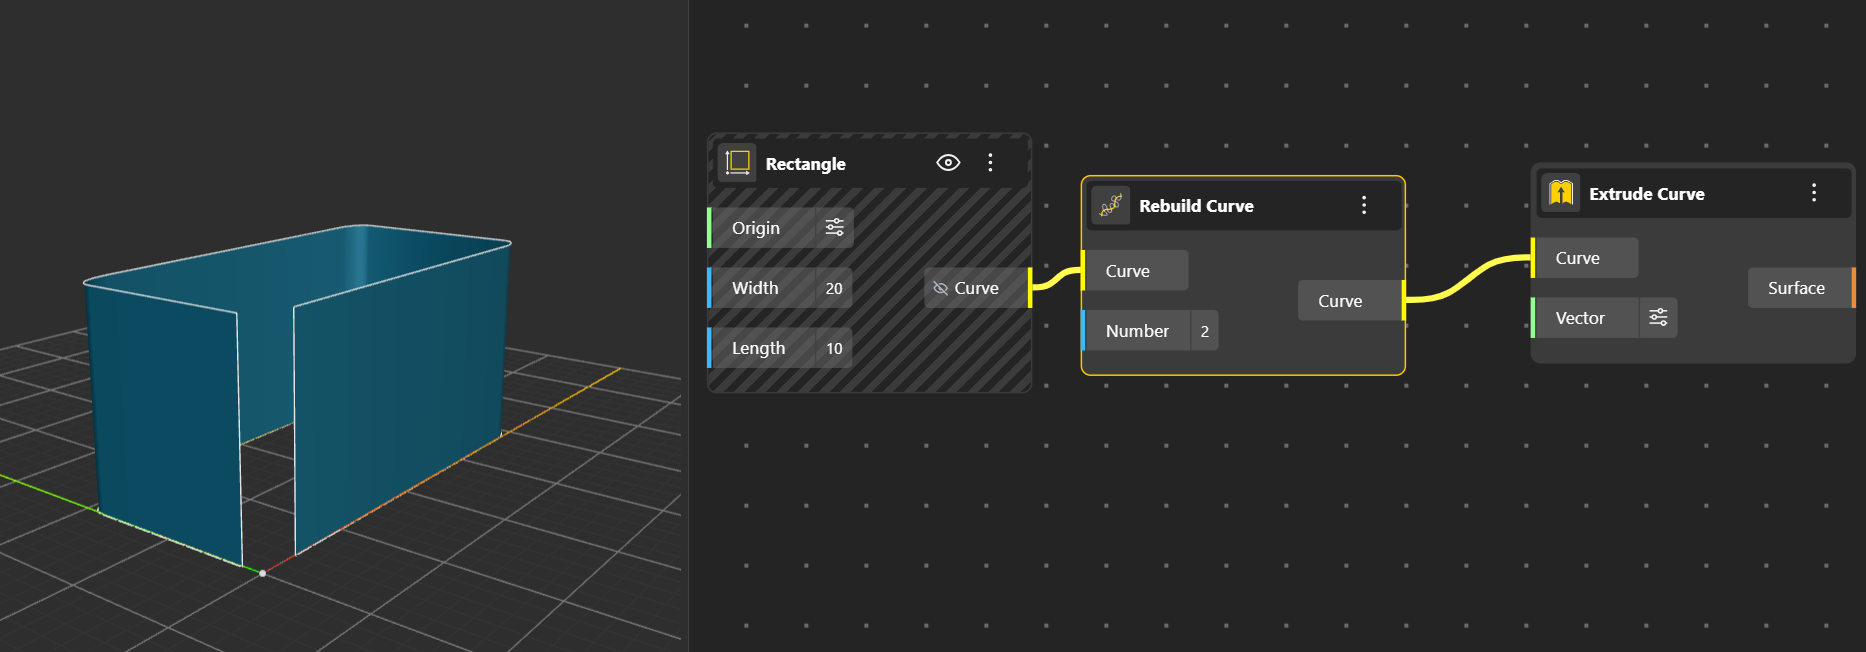
Rebuild Curve Reconstructs the curve using new control points for smoother or cleaner shape control. Number input node lets you decide the degree. (By Default its 3)
Project Curve Projects the curve onto a geometry in a chosen direction.
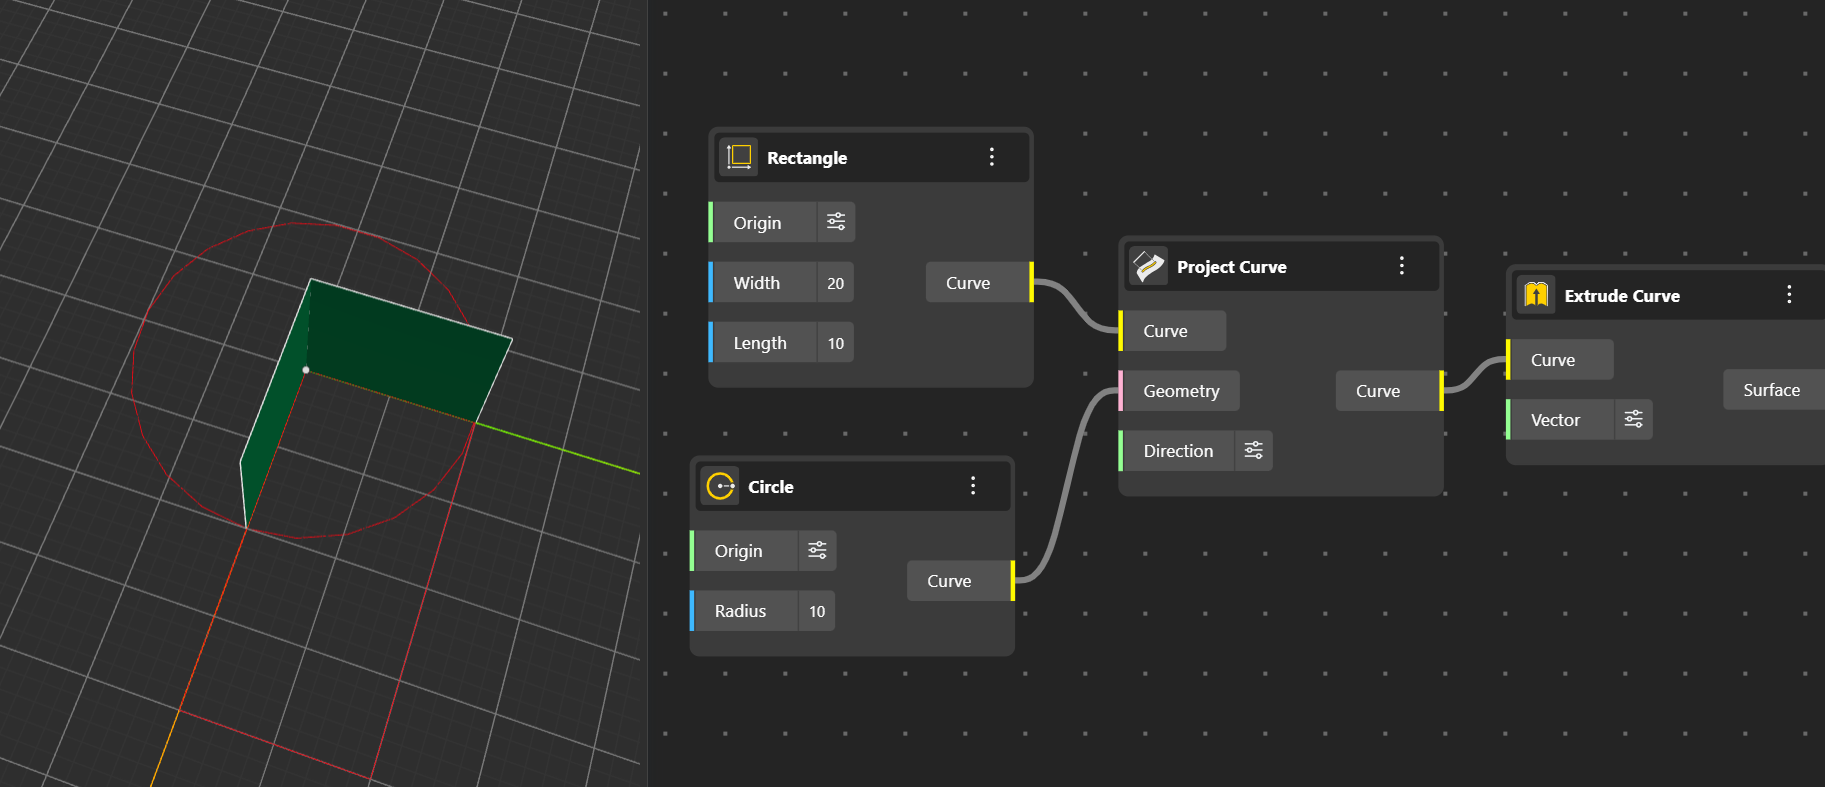
Cull Curves Removes curves from a list based on filters or conditions you define.
Extend Curve Lengthens the curve past its original endpoints.
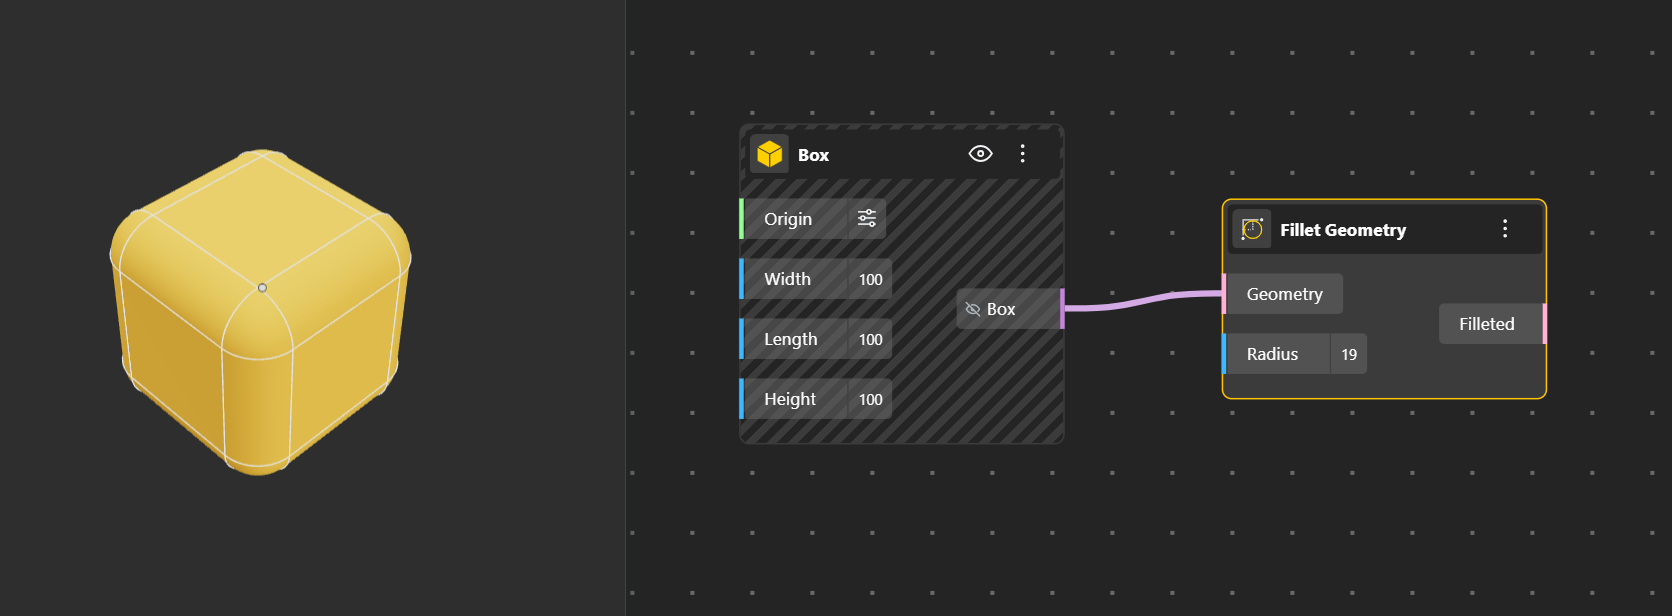
Fillet Geometry Creates a rounded, smooth transition between two edges or curves. Radius input port allows you to define the radius of the Fillet.To clearly see the final result, hide the original geometry so only the filleted output is visible.
Flip Geometry: Reverses the direction or orientation of the curve or geometry.
Geometry Reorient: Moves and aligns geometry to match a new reference plane.
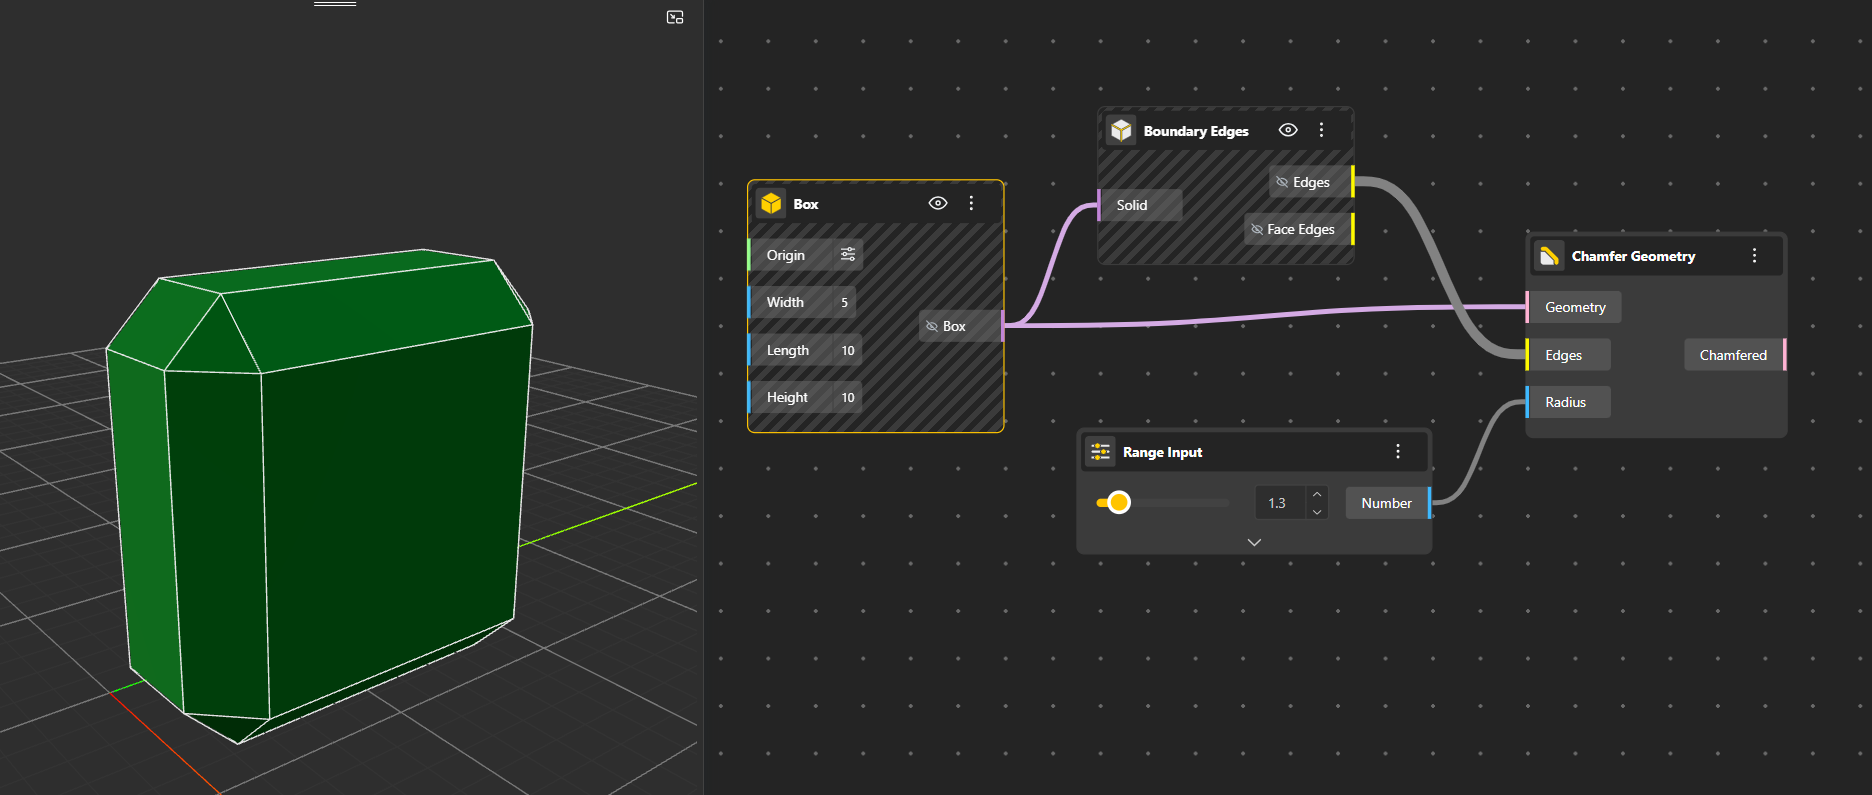
Chamfer Geometry creates a straight, angled cut between edges. To clearly see the final result, hide the original geometry so only the chamfered output is visible.
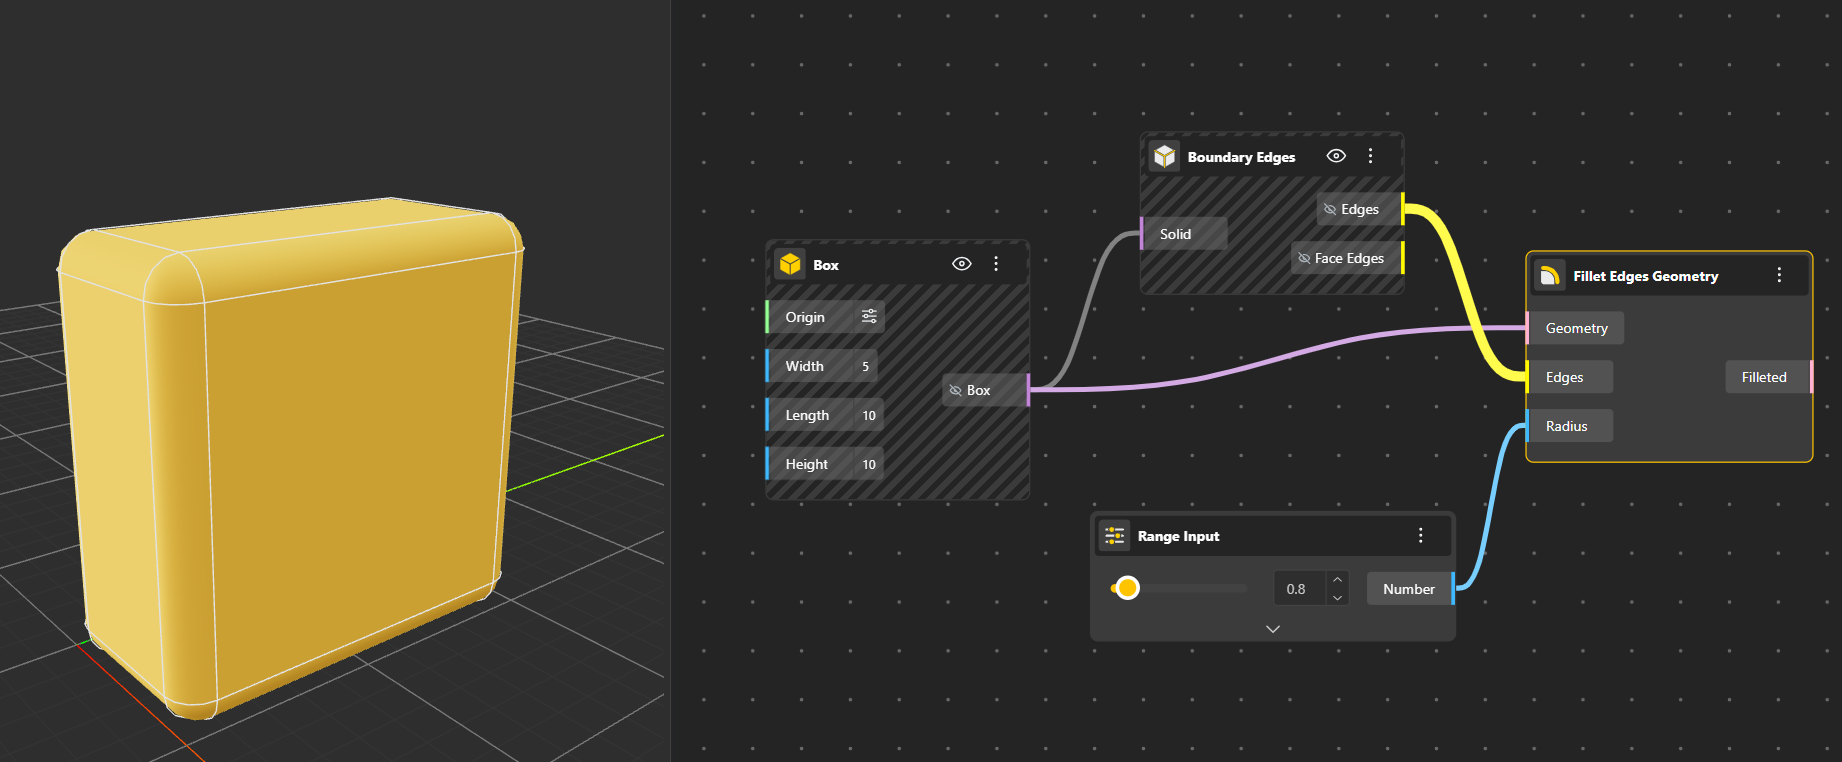
Fillet Edged Geometry applies rounded fillets to all edges of a geometry object.
To clearly see the final result, hide the original geometry so only the filleted output is visible.